A Wire Rope Clip / Cable Clamp is a small fitting with a practical job: it helps secure wire rope around a loop, eye, or attachment point. On a workbench, the parts look simple—a U-bolt, saddle, and nuts—yet their placement affects how the rope holds. The fitting is useful. The details matter.
This article explains why people choose clips for temporary setups, field adjustments, and certain rope terminations, and what their limits mean in real use. A correctly selected clip can make a connection easier to assemble and inspect, especially when a rope must be shortened or repositioned. But “tight enough” is not a reliable installation method. Rope diameter, clip design, number of clips, spacing, orientation, and tightening values should follow the manufacturer’s instructions. A mismatched clamp may crush strands, slip under load, or reduce the rope’s capacity. That risk is easy to underestimate.
A clip is not automatically equivalent to a professionally made termination, and it is not suitable for every load-bearing application. For lifting or other high-consequence uses, rely on approved equipment and qualified guidance rather than assumptions. After installation, check for movement, damaged strands, and loose nuts; repeat inspections as conditions require. Even a neat-looking assembly deserves a close look. Familiar hardware can still be installed incorrectly. Knowing why a clip is used—and when another method is safer—helps make the choice more deliberate.
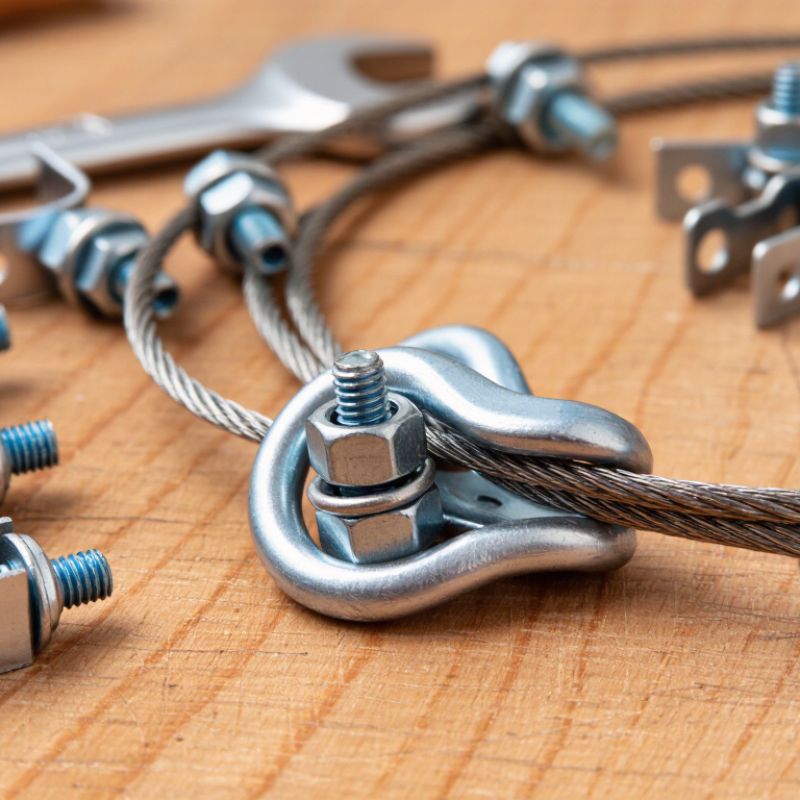
A wire rope clip, sometimes called a cable clamp, is a small fitting used to secure the end of a wire rope. It can form an eye at the rope’s end or hold a rope tail against the standing part. A common design has a U-shaped bolt, a saddle, and two nuts. The rope sits between the bolt and saddle, and tightening the nuts presses the parts together. Simple hardware.
The clip’s job is to grip the rope, not to repair damaged strands or make an unsuitable rope safe. Clip designs and sizes vary, so the fitting must match the rope diameter and intended use.
In a typical U-bolt clip, the saddle sits on the load-bearing part of the rope, while the U-bolt bears on the tail. Check the product instructions for clip quantity, spacing, and tightening requirements; these details are not universal.
Installation can look secure while still being wrong. After setup, inspect the rope for slipping, broken wires, corrosion, or deformation, and recheck the connection as directed. A careful check matters.
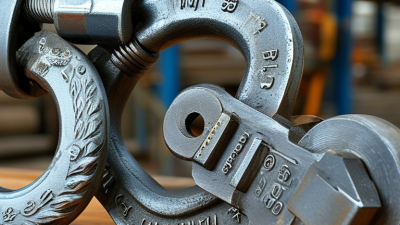
A wire rope clip secures a rope by clamping its dead end against the loaded section, forming an eye or stopping the rope from slipping. The saddle belongs on the live end; the U-bolt bears on the dead end. Get that orientation wrong, and the rope can be crushed where it needs strength. Small detail. Big consequence.
The U.S. Occupational Safety and Health Administration’s construction rigging rule says clip quantity and spacing should follow the clip manufacturer’s recommendations; there is no universal count for every rope size. The Wire Rope Technical Board’s Wire Rope User’s Manual also provides application guidance for selecting and installing clips. Match the clip to the rope diameter, seat it squarely, and tighten its nuts evenly to the specified torque. Recheck after the first load, since strands can settle and tension can change. The U.S. Bureau of Labor Statistics recorded 5,283 fatal work injuries in 2023, though its report does not identify wire-rope clip failures separately. That distinction matters: a clip is only one part of a complete rigging system, and a neat-looking installation is not proof of a safe one.
Wire rope clips, also called cable clamps, are commonly used to form an eye at the end of a wire rope or secure a short tail. You may see them on fence and gate cables, guy lines, utility supports, and temporary rigging where a properly rated termination is specified. A small detail matters: the U-bolt belongs on the dead end, while the saddle bears on the live rope. Incorrect placement can crush or weaken strands. That mistake still happens.
They also appear in maintenance and field repairs, but a clip is not automatically a substitute for a swaged or socketed termination. For lifting, follow the equipment maker’s instructions and applicable standards; do not improvise with unrated hardware. OSHA’s wire-rope sling criteria in 29 CFR 1910.184 call for removal when a rope has 10 randomly distributed broken wires in one lay, or five broken wires in one strand in one lay. Those figures concern sling inspection, not clip capacity, but they show why the whole assembly needs checking. Inspect for slippage, corrosion, flattened strands, and loose nuts after installation and during service. The real-world part is less tidy: vibration and repeated loading can loosen a connection, so inspection intervals deserve thought.
A wire rope clip creates a loop or secures a rope end without specialized swaging equipment. It can be useful for field repairs, adjustable setups, and connections that may need later changes. Installation still demands care. Select a clip sized for the rope, and place the U-bolt over the short dead end while the saddle rests on the loaded section. Tighten nuts evenly to the specified torque. Recheck them after the rope has carried a load, since settling can loosen the connection.
That convenience has limits. An incorrectly fitted clip may slip, crush wire strands, or reduce the rope’s rated capacity. Too little tightening invites movement; too much can deform the rope. A clip termination may also be less efficient than a correctly made splice, though actual performance depends on the rope and approved hardware. For lifting or other safety-critical uses, rely only on a rated assembly and qualified installation instructions. Clips exposed to weather need inspection for corrosion, looseness, and strand damage. They are not maintenance-free. A quick glance can miss a problem, so check the connection closely before each use.
Why Use a Wire Rope Clip or Cable Clamp? How to Choose and Install the Right Clip
Choose a clip that matches the rope’s diameter, construction, and intended load—not just one that fits the cable. Check the manufacturer’s instructions for clip count, spacing, torque, and rope-tail length. The Wire Rope Technical Board’s Wire Rope Users Manual puts properly installed clip terminations at roughly 80% efficiency, a useful reminder that a clipped eye may not retain the rope’s full rated strength. The actual capacity depends on the setup. Small details matter.
For a common U-bolt clip, place the U-bolt over the dead end and the saddle against the live, load-bearing strand. Space clips evenly, then tighten each nut to the specified torque with a calibrated wrench. OSHA’s construction standard, 29 CFR 1926.251, also directs users to follow the manufacturer’s clip-installation recommendations. Don’t guess from appearance; a neat-looking assembly can still be loose.
After the first load, unload and recheck the nuts, since the rope can settle and reduce tension. Inspect for crushed strands, slipping, corrosion, or a bent clip before each use. Replace damaged parts rather than trying to make them work. It is easy to rush this step. I’d rather pause and check the rope tail and torque again than assume a tight-looking clip is secure.
| Decision or Step | What to Check | Practical Guidance | Why It Matters |
|---|---|---|---|
| Purpose | What the rope termination will do | A wire rope clip can form an eye or secure a rope end when the clip is correctly matched, installed, and used within its rated application. | A correctly assembled termination helps prevent the rope end from slipping. A clip does not increase the rope’s strength or make an unsuitable setup safe. |
| Rope diameter | Nominal diameter of the wire rope | Choose a clip specifically sized for the rope diameter. Use the clip manufacturer’s selection and installation tables for the exact clip model. | An incorrectly sized clip may not seat or grip the rope as intended. |
| Rope construction | Rope type, construction, and core | Check that the clip is approved for the rope construction and intended use. When in doubt, consult the clip and rope manufacturers’ guidance. | Different rope constructions can respond differently to clamping and bending. |
| Clip design | Clip style and manufacturer instructions | Use a clip design specified for the application. Do not assume that different clip designs share the same number of clips, spacing, torque, or rated performance. | Installation requirements vary by design and size; following the correct instructions is essential. |
| Material and environment | Exposure to moisture, chemicals, and corrosion | Select compatible materials for the rope and environment. Consider corrosion exposure and potential contact between dissimilar metals; follow applicable product guidance. | Corrosion can damage components and reduce the reliability of the termination. |
| Prepare the rope | Rope condition and the planned eye | Inspect the rope for damage and use a thimble where the design calls for one to help protect the eye from wear and crushing. Lay out the live end and dead end clearly. | Damage or an unsuitable bend can compromise the rope independently of the clip. |
| Orient the clip | Which part of the rope the saddle contacts | For the common U-bolt style, place the saddle on the live (load-bearing) end and the U-bolt on the dead end. Follow the specific clip instructions if its design differs. | Reversing a common U-bolt clip can damage or inadequately grip the live end. |
| Set clip count and spacing | Rope size and the clip’s installation table | Use the specified number of clips and spacing for the exact clip and rope size. Do not rely on a universal clip count or spacing rule. | Too few clips or incorrect spacing can reduce the holding performance of the termination. |
| Tighten fasteners | Specified torque and tightening sequence | Seat the clip components correctly and tighten the nuts evenly to the torque specified by the manufacturer. Use a calibrated torque wrench when required. | Insufficient or excessive tightening can affect grip or damage the rope and hardware. |
| Inspect after installation | Clip seating, alignment, and signs of movement | Check that the rope is properly seated and that all fasteners are secure. Recheck or retighten after initial loading only as directed by the manufacturer. | Inspection can identify movement or loosening before continued use. |
| Know the limitations | Whether the termination will support lifting or critical loads | Do not use a wire rope clip for overhead lifting or another critical application unless the clip, rope assembly, installation, and use are specifically approved for it and comply with applicable requirements. | General-purpose clip guidance is not a substitute for a rated, engineered, and compliant lifting termination. |